Choosing the perfect Wi-Fi router can be as crucial as selecting the right route for a road trip – it determines the quality of your entire online journey. A well-chosen router can guarantee seamless, secure, and speedy internet.
But what makes one router better than another? Your budget, internet service provider, and the number of devices to connect are just a few key factors to consider.
However, there’s more to it if you want to ensure a flawless online experience. What’s the tipping point that sets great routers apart?
1. Determine Your Budget and Needs
To choose the right Wi-Fi router, you’ll need to determine your budget and evaluate your specific needs, considering factors such as the size of your coverage area, the number of devices you’ll be connecting, and the types of online activities you’ll be performing.
If you have a large home or many devices, you’ll need a more powerful router to guarantee reliable connections.
Consider the speed of your internet plan and the type of activities you’ll be doing online, such as streaming or gaming. These require more bandwidth and a router that can handle the demand.
2. Ensure Compatibility with Your Internet Service Provider (ISP)
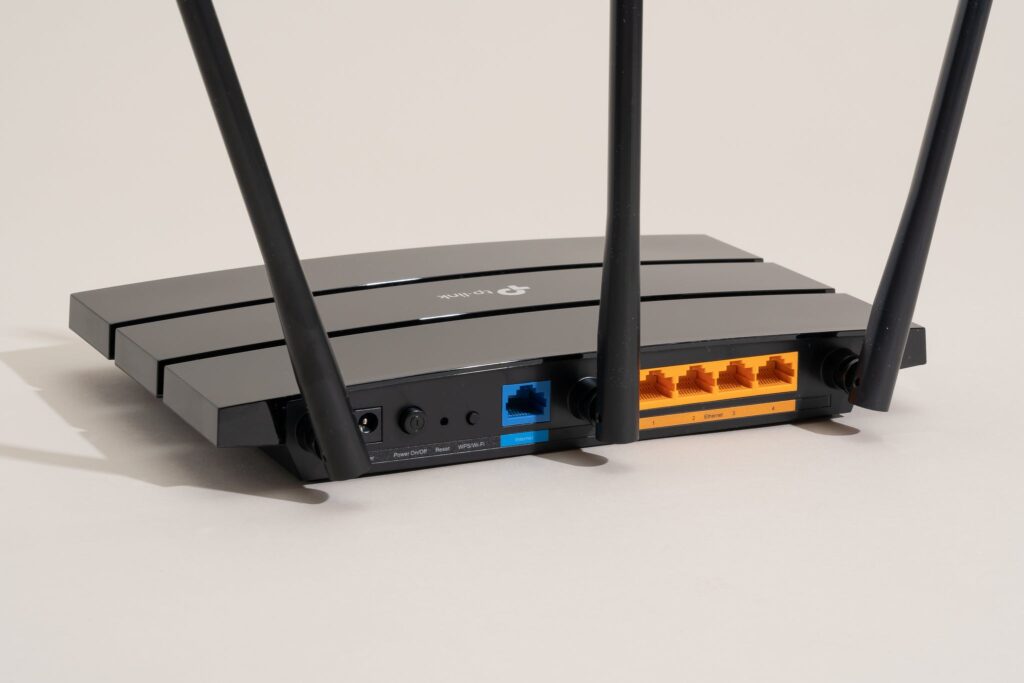
Your new Wi-Fi router must be compatible with your Internet Service Provider (ISP) to function properly, so it’s vital to check the ISP’s requirements and supported router models before making a purchase.
You’ll want to verify that the router you choose supports your ISP’s network type, such as DSL, cable, or fiber-optic.
Check your ISP’s website or contact their customer support to obtain a list of approved routers. Some ISPs may also have specific requirements for router configuration or settings.
Confirming compatibility will save you from potential headaches and troubleshooting issues down the line.
Take the time to research and confirm compatibility to guarantee a smooth setup and peak performance from your new router.
3. Look for Sufficient Speed and Wi-Fi Standards Support
When selecting a Wi-Fi router, consider the types of devices that will be connecting to it and the expected network usage to determine the necessary speed and Wi-Fi standards support. You’ll want to make sure your router can handle the number of devices you’ll be connecting and the types of activities you’ll be performing, such as streaming, gaming, or online backups.
| Wi-Fi Standard | Speed |
|---|---|
| 802.11ac | 1.3 Gbps |
| 802.11ax (Wi-Fi 6) | 9.6 Gbps |
| 802.11n | 600 Mbps |
| 802.11b/g | 54 Mbps |
Check the router’s specifications for the latest Wi-Fi standard, such as Wi-Fi 6 (802.11ax), and make sure it can support the necessary speed for your network. This will guarantee you get the best performance from your router.
4. Evaluate Range and Coverage Features
Evaluating a router’s range and coverage attributes is essential because it determines how effectively the device can transmit a strong, reliable Wi-Fi signal throughout your space.
You’ll want to take into account the size of your home or office and the number of physical barriers, such as walls and floors, that the signal will need to penetrate.
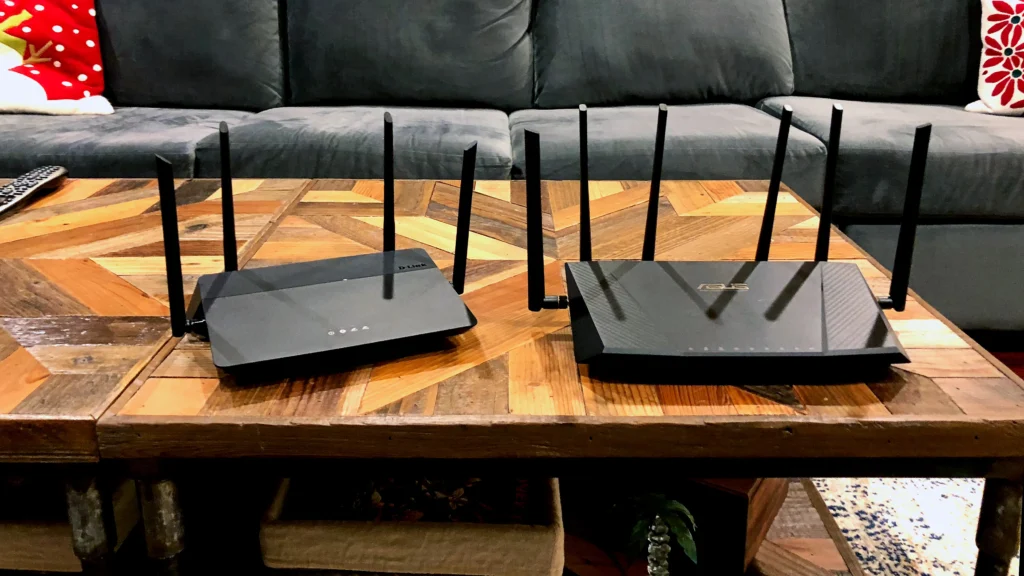
Look for a router with a high number of external antennas, as these can help to improve the signal’s strength and directionality.
Moreover, think about a router with beamforming technology, which can focus the signal on specific devices to improve coverage.
Some routers also offer range extenders or mesh networking capabilities, which can help to eliminate dead spots and provide a stronger, more reliable connection.
5. Prioritize Security and Additional Features
Routers frequently come with a range of security functions that you should prioritize, including firewalls, WPA2 encryption, and guest network options, which can help protect your network from unauthorized access and malicious activity.
You’ll also want to look for a router with built-in VPN support, which can encrypt your internet traffic and shield your identity online.
Furthermore, consider characteristics like parental controls, which can help you restrict access to certain websites and set limits on screen time.
Some routers also offer quality of service (QoS) settings, which allow you to prioritize traffic for critical applications like video streaming or online gaming.
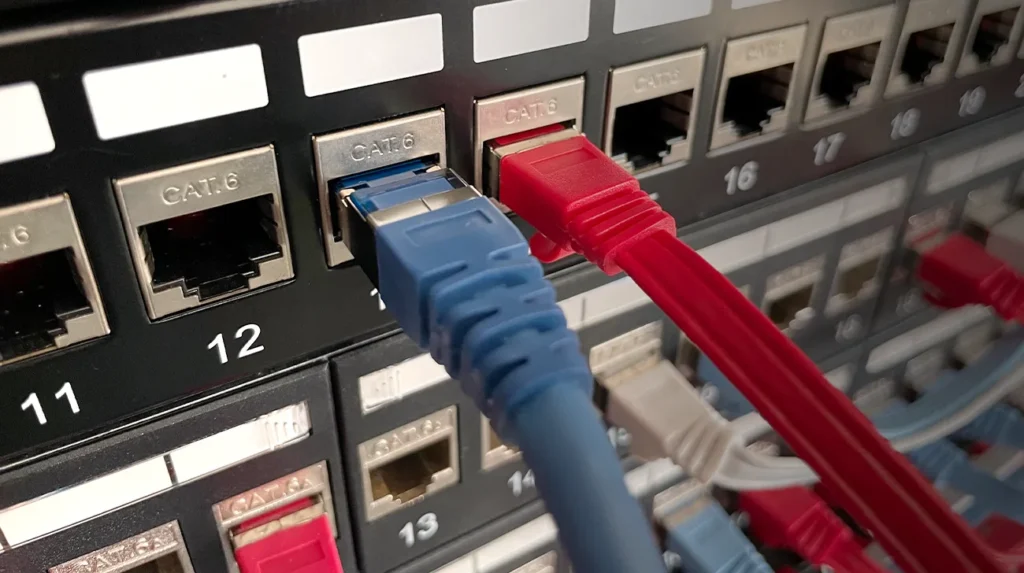
I’ve navigated the world of networking, from building LAN parties in college dorms to optimizing enterprise systems. Along the way, I’ve encountered my fair share of flat Ethernet cables. While their sleek design might seem appealing, I’m here to shed light on why they often fall short.
Flat Ethernet cables, though convenient for some scenarios, are often not the best choice due to their increased susceptibility to crosstalk (signal interference), lack of durability, and limited applications compared to traditional round cables.
Curious about the specifics? Let’s untangle the intricacies of flat Ethernet cables together and uncover why they might not be the ideal solution for your networking needs.
1. Crosstalk
Crosstalk is a frustrating issue that can significantly impact your network’s performance when using flat Ethernet cables.
The close proximity of the twisted pairs in these cables makes them more susceptible to signal interference, leading to data errors, packet loss, and reduced throughput.
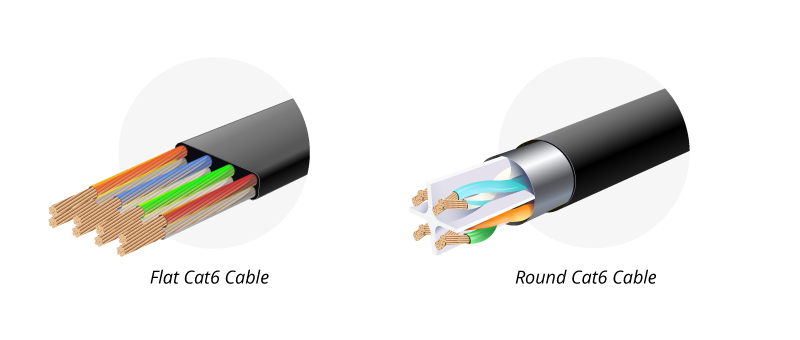
Unlike round cables, flat cables have their twisted pairs arranged side by side, with minimal physical separation between them. This layout increases electromagnetic coupling between the pairs, which is the main cause of crosstalk.
Imagine trying to have a conversation with someone in a crowded room. The closer you are to other people talking, the harder it becomes to hear and understand the person you’re speaking with.
The same principle applies to the signals in flat Ethernet cables. The closer the twisted pairs are to each other, the more likely they are to ‘overhear’ and interfere with each other’s conversations.
Another factor contributing to crosstalk in flat cables is the lack of a central filler material. In round cables, this filler helps maintain the separation between the twisted pairs, providing better insulation and reducing crosstalk. Without this additional insulation, flat cables are more prone to signal interference.
The consequences of crosstalk can be severe, especially over longer distances. As the signals travel along the cable, the interference accumulates, leading to signal degradation and data corruption. This can result in slower network speeds, frequent disconnections, and overall poor performance.
To mitigate the effects of crosstalk, it’s essential to choose high-quality Ethernet cables that are designed to minimize interference. Look for cables with well-insulated twisted pairs and adequate shielding.
In situations where longer cable runs are necessary, consider using round cables instead of flat ones, as they generally provide better protection against crosstalk.
2. Lack of shielding
Flat Ethernet cables lack proper shielding, making them more susceptible to signal degradation and electromagnetic interference (EMI). Shielding is essential for protecting the data being transmitted from external electrical noise.
When you use a flat Ethernet cable, you’re exposing your network to potential disruptions from nearby electronic devices.
Imagine trying to have a conversation in a noisy room. It’s hard to hear the other person clearly, and you might miss important parts of the discussion.
The same thing happens with unshielded flat Ethernet cables. The data being sent through the cable gets mixed up with the electrical noise from other devices, causing data loss or slower transmission speeds.
This problem is especially noticeable in environments with a lot of electronic equipment, like offices or homes with multiple computers, phones, and appliances.
Every time you turn on a device near an unshielded flat Ethernet cable, you risk disrupting your network connection.
To avoid these issues, it’s best to use shielded Ethernet cables in areas with high electromagnetic interference. Shielded cables have an extra layer of protection that helps block out external noise, ensuring your data arrives intact and at the fastest possible speeds.
If you must use a flat Ethernet cable, try to keep it away from other electronic devices as much as possible. Run the cable along walls or under furniture, rather than across open spaces where it’s more likely to pick up interference.
By minimizing the cable’s exposure to EMI, you can help reduce the risk of network disruptions and maintain a more stable connection.
3. Durability
Flat Ethernet cables might seem like a great choice for your installation because of their flexible design, but their durability is a major concern.
The thin casing and lack of protective materials make them more prone to damage from everyday wear and tear. Bending, twisting, or pulling the cable can cause significant harm over time.
Flat cables also struggle to withstand environmental factors and physical stress. This means you’ll need to spend more time maintaining them to keep your network running smoothly. More maintenance means more downtime and less reliability for your Ethernet connection.
If you’re looking for a cable that can handle frequent movement and last a long time, flat Ethernet cables aren’t your best bet.
They’re better suited for permanent installations where the cable won’t be disturbed often, like running along a baseboard or behind a wall.
For standard Ethernet patch leads that need to be moved around regularly, stick with round cables. Their thicker casing and protective filler materials make them more durable and resistant to damage.
You’ll save time and hassle in the long run by choosing a cable that can withstand the rigors of daily use.
4. Limited applications
Flat Ethernet cables have limited applications due to their design shortcomings and vulnerability to damage. These cables are best suited for fixed installations where frequent movement or adjustments aren’t required.
The lack of protective filler materials and sufficient insulation makes them less durable and reliable, as they’re more prone to wear and tear.
Flat cables are also more susceptible to electromagnetic interference (EMI), which further restricts their use in areas with high electronic activity. If you’re setting up a network in an environment with many electronic devices, it’s best to avoid flat cables and opt for round ones instead.
Another limitation of flat Ethernet cables is their shorter transmission distance support. They typically support distances of up to 30 meters, compared to round cables that can handle up to 100 meters. This makes flat cables less suitable for extensive network setups spanning larger areas.
To illustrate the differences between flat and round cables, consider this comparison table:
| Feature | Flat Cables | Round Cables |
|---|---|---|
| Durability | Lower | Higher |
| EMI Susceptibility | Higher | Lower |
| Maximum Distance | ~30 meters | ~100 meters |
| Flexibility | High | Moderate |
| Ideal Applications | Fixed installations | Versatile, including mobile |
As you can see, round cables outperform flat cables in terms of durability, EMI resistance, and maximum transmission distance. They’re also more versatile and suitable for a wider range of applications, including mobile setups.
When deciding between flat and round Ethernet cables, consider your specific needs and the environment in which the cables will be used.
If you require a durable, reliable, and versatile solution, round cables are the way to go. Reserve flat cables for fixed installations where their limitations won’t impact the network’s performance and longevity.
5. Tangling

Flat Ethernet cables may seem convenient, but their thin and flexible design often leads to a tangled mess. Without the rigid structure provided by internal filler materials, these cables easily intertwine and twist, creating a frustrating cable management nightmare.
Untangling flat cables can be a real time sink. You might find yourself spending way too much time trying to separate the cables, which can be both annoying and potentially damaging to the cables themselves. This hassle can slow down your network setup or maintenance process considerably.
Tangled cables don’t just look bad; they can also cause signal interference and connectivity issues. When cables are twisted and intertwined, it can disrupt the flow of data, leading to slower speeds or even complete network failures. This is the last thing you want when you’re trying to maintain a stable and efficient network.
To avoid these headaches, it’s best to opt for structured Ethernet cables with proper internal support. These cables are designed to maintain their shape and resist tangling, making cable management a breeze. You’ll save time, reduce frustration, and ensure your network performs at its best.
In short, while flat Ethernet cables might seem like a good idea at first, their tendency to tangle makes them more trouble than they’re worth. Stick with structured cables, and you’ll be glad you did when it comes to installation, maintenance, and overall network performance.
Tired of tangled wires and unsightly cables? I’ve got a solution that won’t require a trip to the hardware store.
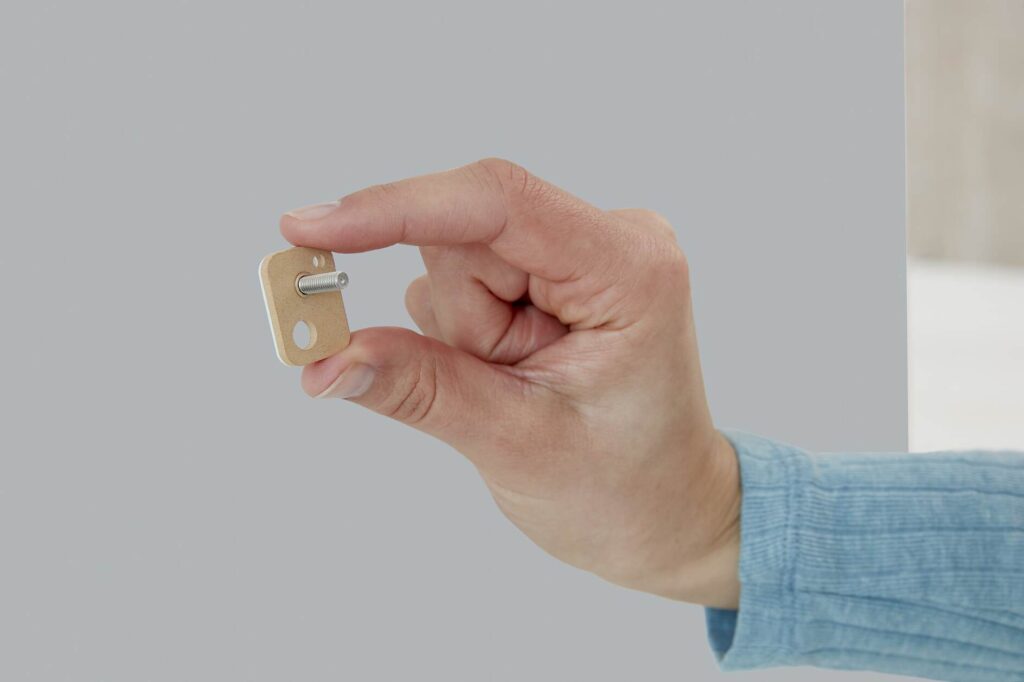
Absolutely! You can easily mount your router on the wall without drilling. Adhesive strips, hooks, or even a simple shelf can do the trick. Some routers even come with built-in mounting slots. Just ensure your chosen method supports the router’s weight and doesn’t obstruct any ventilation.
Curious to know the specifics? Let me guide you through a few ingenious methods that’ll have your Wi-Fi signal soaring high, all without leaving a single hole in your wall.
Why Go Drill-Free?
Choosing drill-free solutions for your home or office can save you a lot of hassle. First, you avoid damaging walls. Drilling can leave holes that are hard to fix if you decide to move or change your decor.
Flexibility is another benefit. With drill-free options, you can easily move or adjust your setup. This is great for people who like to update their spaces frequently.
Ease of installation is a big plus. Most drill-free products use adhesive strips, hooks, or tension rods. These are simple to install and don’t require special tools or skills.
Cost-effective solutions often come in the form of affordable products. For example:
- Command Hooks and Caddies: Easy to install and remove, good for organizing spaces.
- Faucet Racks: Free up sink space without the need for drilling.
Using drill-free options is also renter-friendly. Many rentals have strict rules against drilling, so these solutions allow you to personalize your space without violating your lease.
Best Methods for Mounting a Router Without Drilling
Mounting your router without drilling is easier than you might think. Here are some effective methods to consider:
- Adhesive Hooks: Adhesive hooks are a great option. These hooks stick to the wall and can hold the weight of your router.
To use them, make sure the surface is clean before applying the hook. Then, press firmly and wait for the adhesive to cure. After that, you can hang your router.
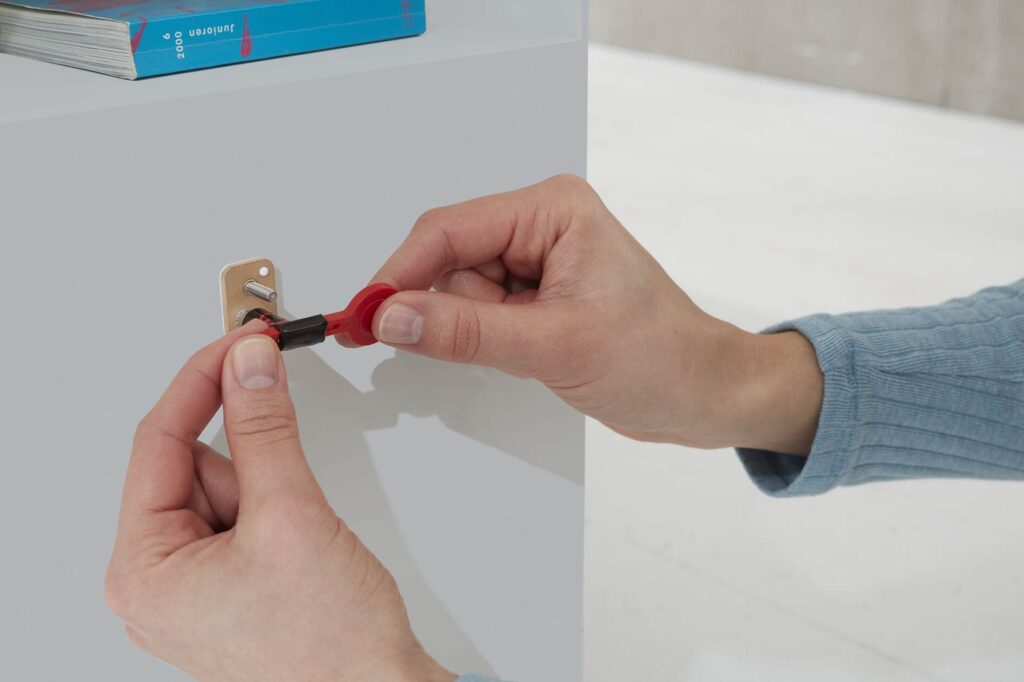
- Wall Mount Brackets with Adhesives: Purchase a wall mount bracket designed for routers. Attach the bracket to your router using the included screws.
Then, peel off the adhesive backing and stick the bracket to your wall. Make sure it is secure before letting go. This method avoids drilling entirely and keeps your router stable.
- Velcro Strips: Velcro strips offer flexibility. Attach one side of the Velcro to the router and the other to the wall. This allows you to easily remove the router if needed.
Make sure the Velcro has strong adhesive properties to hold the router securely.
- Cable Ties and Mounts: Cable ties can be used with adhesive cable mounts. Stick the mounts to the wall and use the cable ties to secure the router in place.
This method is especially useful for lightweight routers.
- Glue Options: Strong adhesives or glue can also be used. Apply the glue to the mounting points and press the router to the wall.
Allow sufficient time for the glue to dry and hold the router securely.
- Double-sided Tape: Heavy-duty double-sided tape can also work well. Cut strips of tape and place them on the back of the router.
Then, stick the router to the wall, pressing firmly. This method is quick and easy.
Each of these methods provides a convenient and secure way to mount your router without drilling holes in your wall. Make sure you choose a method that suits the weight and size of your router for the best results.
Step-by-Step Guide
Creating a step-by-step guide can help simplify complex tasks. Follow these instructions to create your own guide effectively.
Identify the Goal
First, clearly state what the guide will achieve. Define the task or process you want to explain.
Gather Necessary Materials
Make a list of all the materials or tools needed. For example:
- Pen and paper
- Specific software
- Raw materials
Break Down the Steps
List each step in the order it needs to be done. Use simple sentences and clear language to keep it straightforward.
- Start with an introductory step: Briefly explain the purpose.
- Detail the actions required: Use bullet points or numbered lists.
- Include images or diagrams: Visual aids are very helpful.
Provide Examples
Include examples to illustrate your points. This makes it easier for the reader to understand.
Example:
When you say, “Open the software,” show a screenshot of the software being opened.
Review and Edit
After writing your guide, review it. Make sure each step is clear and logical. Then, edit for any errors or unclear parts.
Test the Guide
Have someone else follow the guide. This way, you can see if any steps are missing or need further explanation.
Finalize the Guide
Once you’ve tested and refined it, format the guide nicely. Use bold text for important points and ensure the layout is user-friendly.
How to Mount Your Router Without Drilling
Mounting your router without drilling is simple and saves your walls from damage. Here are some effective methods:
Adhesive Strips
Adhesive strips work well for lightweight routers. Look for strong, double-sided strips.
Make sure the wall surface is clean. Then, apply the strips to the back of the router and press it firmly onto the wall for a few seconds.
Command Hooks
Command hooks are another good option. Choose hooks that can support the weight of your router.
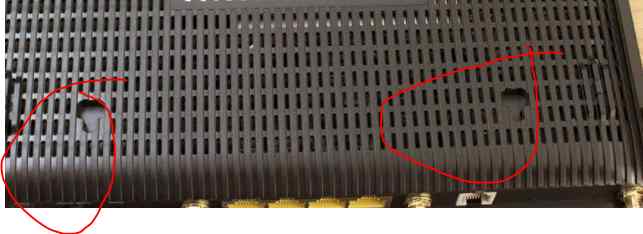
Then, stick the hooks to the wall where you want your router. Hang the router using its mounting holes or other points.
Router Wall Mount Bracket
A wall mount bracket with adhesive backing is a sturdy choice. Attach the bracket to the router using screws.
Then, peel off the adhesive backing and stick the bracket to the wall. Make sure to route the cords neatly.
Velcro Strips
Velcro strips offer flexibility and easy removal. Attach one side of the Velcro to the router and the other to the wall.
This method keeps the router secure and makes repositioning simple.
Place on a Shelf
If you prefer, place the router on a nearby shelf. This avoids the need for sticky or permanent solutions.
Ensure the shelf is stable and at a good height for signal coverage.
How To Organize Cables
Start with Decluttering
First, sort through all your cables. Remove any that are broken or no longer needed. This step makes the following organization easier and reduces clutter.
Label Your Cables
Use labels or color-coded tags to mark each cable. This saves time when you need to find a specific one. You can use pre-made labels or simple tape and a marker.
Use Cable Ties
Gather cables together with hook-and-loop fasteners or zip ties. This prevents tangles and keeps them neatly organized. Be careful not to over-tighten and damage the cables.
Cord Holders and Clips
Adhesive cord holders can keep cables attached to desks or walls. Simply peel the backing and stick them in place. They help to keep cables off the floor and out of sight.
Cable Management Boxes
Place power strips and excess cable length inside a cable management box. These boxes hide the mess and protect the cables from dust.
Repurpose Household Items
Use items like a shoe rack or even toilet paper rolls to store and organize extra cables. Each roll can hold a single cable, preventing them from tangling with others.
Fasten to Walls or Furniture
Use coaxial cable staples or tubing to secure cables along walls or under desks. This way, they’re hidden and protected, making your space look cleaner.
Utilize Drawer Organizers
Drawer organizers with compartments can store small cables neatly. They keep everything separated and easy to find.
Invest in Cable Sleeves
Cable sleeves can bundle multiple cables together. They keep them organized and protected from wear and tear. Sleeves can be cut to the desired length and are easy to install.
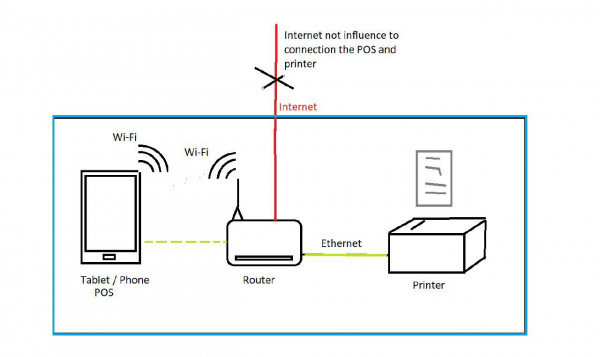
In a world where printers and computers often rely on wireless connections, there may be times when a direct, wired connection is preferable. Whether you’re dealing with a temperamental Wi-Fi network or simply prefer the stability of an Ethernet connection, connecting your printer directly to your computer without a router is possible.
By using an Ethernet cable, you can establish a direct connection between your printer and computer, bypassing the need for a router. This method involves configuring your devices with static IP addresses and ensuring they are on the same subnet.
With a few simple steps, you can enjoy the benefits of a wired printer connection without the complexity of a network setup.
Why Connect a Printer Directly to Your Computer?
Connecting a printer directly to your computer can provide several advantages. One primary benefit is reliability. A direct connection ensures a stable, continuous link between your computer and the printer.
It’s also secure. Information sent through a direct connection is less likely to be intercepted compared to network printing, adding an extra layer of protection for sensitive documents.
Another advantage is simplicity. Setting up a wired connection can be straightforward. You plug the printer into your computer’s USB port, and the system usually handles the rest.
Cost-efficiency is another reason. A direct connection eliminates the need for additional network infrastructure or wireless modules, reducing overall setup costs.
For those printing small volumes, a direct connection is highly efficient. It ensures immediate printing without the delay that sometimes happens over a network.
In summary, connecting a printer directly to your computer combines reliability, security, and cost-efficiency, making it an excellent choice for many users.
What You’ll Need to Get Started
To get started, you need a few basic items. Here’s a list to help you gather everything you need:
- Device: You’ll need a computer or a smartphone. Most modern devices can handle basic tasks.
- Internet Connection: A reliable and fast internet connection is vital. This ensures uploads and downloads happen smoothly.
- Software: Depending on what you’re doing, you might need specific apps. Many tasks can be done with free or built-in software.
Basic Equipment
You don’t need expensive gear to get started. Here are some essentials:
- Camera: You can use your smartphone camera. It’s good enough for most tasks.
- Microphone: If you want better audio, consider a USB microphone. It improves sound quality drastically.
- Lighting: Natural light works great. You can also use desk lamps to improve visibility.
Setting Up Your Workspace
A comfortable workspace makes a big difference. Follow these tips to set up your area:
- Desk and Chair: Use a sturdy desk and a comfortable chair.
- Quiet Environment: Find a quiet spot. Background noise can be distracting.
- Good Lighting: Ensure your workspace is well-lit. It reduces eye strain and improves video quality if you’re recording.
Examples of What You Might Need
If you’re starting a YouTube channel, you might need:
- Video Editing Software: Programs like iMovie or Windows Video Editor can help.
- Thumbnail Creator: Tools like Canva are great for making engaging thumbnails.
- Scheduling Tool: This helps you plan and stay consistent.
Having these basics covered will set you on the right path. You don’t need to spend a lot of money upfront. Start simple, and upgrade as you go.
Step-by-Step Guide
In this section, you will find clear instructions to help you set up and use your new printer. Follow these steps to connect your printer, install drivers, set it as the default, and print a test page.
Connecting Your Printer
First, unbox your printer and locate the power cable. Plug one end into the printer and the other into a power outlet. Turn on the printer by pressing the power button, usually located on the front or top.
Next, find the USB cable that came with the printer. Connect one end to the printer and the other end to your computer. If your printer supports Wi-Fi, refer to the user manual to connect your printer to your home network. This generally involves selecting the Wi-Fi network from the printer’s menu and entering the password.
Place the printer close to your computer or router for a strong connection. Make sure it is in a position where it can easily load paper and access ink or toner cartridges.
Installing Printer Drivers on Your Computer
Go to the printer manufacturer’s website to download the latest drivers for your printer model. Drivers ensure your computer and printer can communicate effectively.
Select your operating system (Windows, macOS, etc.), download the driver package, and run the installer. Follow the on-screen instructions. You may need to restart your computer to complete the installation.
If your printer uses a CD for driver installation, insert the CD into your computer’s drive and follow the prompts. If you face any issues finding the drivers, check the support section of the manufacturer’s website or consult the printer’s user manual.
Setting Your Printer as the Default
Go to your computer’s settings. On Windows, open the Control Panel and click on “Devices and Printers.” Find your printer in the list, right-click it, and select “Set as default printer.”
On macOS, open “System Preferences,” then “Printers & Scanners.” Select your printer from the list on the left, and click the “Default” button.
This ensures that your computer uses your printer for all print jobs unless you choose another printer manually. Verifying that your printer is the default prevents printing errors and streamlines your workflow.
Printing Your First Test Page
Load paper into the printer’s input tray. Make sure it is properly aligned and not overfilled. Open a document or image file on your computer.
Go to the print command, usually found under “File,” and select “Print.” Ensure your printer is selected in the print dialog box. Look for a “Print Test Page” button in the printer settings or utility software, and click it to print a test page.
Check the test page for clarity and alignment. If anything looks off, refer to the printer’s troubleshooting guide. This step helps confirm that everything is set up correctly and that the printer is ready for regular use.