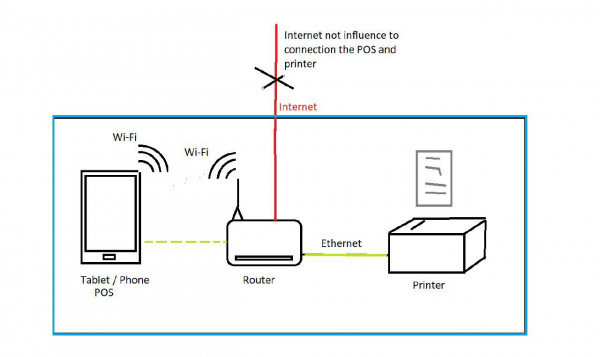
In a world where printers and computers often rely on wireless connections, there may be times when a direct, wired connection is preferable. Whether you’re dealing with a temperamental Wi-Fi network or simply prefer the stability of an Ethernet connection, connecting your printer directly to your computer without a router is possible.
By using an Ethernet cable, you can establish a direct connection between your printer and computer, bypassing the need for a router. This method involves configuring your devices with static IP addresses and ensuring they are on the same subnet.
With a few simple steps, you can enjoy the benefits of a wired printer connection without the complexity of a network setup.
Why Connect a Printer Directly to Your Computer?
Connecting a printer directly to your computer can provide several advantages. One primary benefit is reliability. A direct connection ensures a stable, continuous link between your computer and the printer.
It’s also secure. Information sent through a direct connection is less likely to be intercepted compared to network printing, adding an extra layer of protection for sensitive documents.
Another advantage is simplicity. Setting up a wired connection can be straightforward. You plug the printer into your computer’s USB port, and the system usually handles the rest.
Cost-efficiency is another reason. A direct connection eliminates the need for additional network infrastructure or wireless modules, reducing overall setup costs.
For those printing small volumes, a direct connection is highly efficient. It ensures immediate printing without the delay that sometimes happens over a network.
In summary, connecting a printer directly to your computer combines reliability, security, and cost-efficiency, making it an excellent choice for many users.
What You’ll Need to Get Started
To get started, you need a few basic items. Here’s a list to help you gather everything you need:
- Device: You’ll need a computer or a smartphone. Most modern devices can handle basic tasks.
- Internet Connection: A reliable and fast internet connection is vital. This ensures uploads and downloads happen smoothly.
- Software: Depending on what you’re doing, you might need specific apps. Many tasks can be done with free or built-in software.
Basic Equipment
You don’t need expensive gear to get started. Here are some essentials:
- Camera: You can use your smartphone camera. It’s good enough for most tasks.
- Microphone: If you want better audio, consider a USB microphone. It improves sound quality drastically.
- Lighting: Natural light works great. You can also use desk lamps to improve visibility.
Setting Up Your Workspace
A comfortable workspace makes a big difference. Follow these tips to set up your area:
- Desk and Chair: Use a sturdy desk and a comfortable chair.
- Quiet Environment: Find a quiet spot. Background noise can be distracting.
- Good Lighting: Ensure your workspace is well-lit. It reduces eye strain and improves video quality if you’re recording.
Examples of What You Might Need
If you’re starting a YouTube channel, you might need:
- Video Editing Software: Programs like iMovie or Windows Video Editor can help.
- Thumbnail Creator: Tools like Canva are great for making engaging thumbnails.
- Scheduling Tool: This helps you plan and stay consistent.
Having these basics covered will set you on the right path. You don’t need to spend a lot of money upfront. Start simple, and upgrade as you go.
Step-by-Step Guide
In this section, you will find clear instructions to help you set up and use your new printer. Follow these steps to connect your printer, install drivers, set it as the default, and print a test page.
Connecting Your Printer
First, unbox your printer and locate the power cable. Plug one end into the printer and the other into a power outlet. Turn on the printer by pressing the power button, usually located on the front or top.
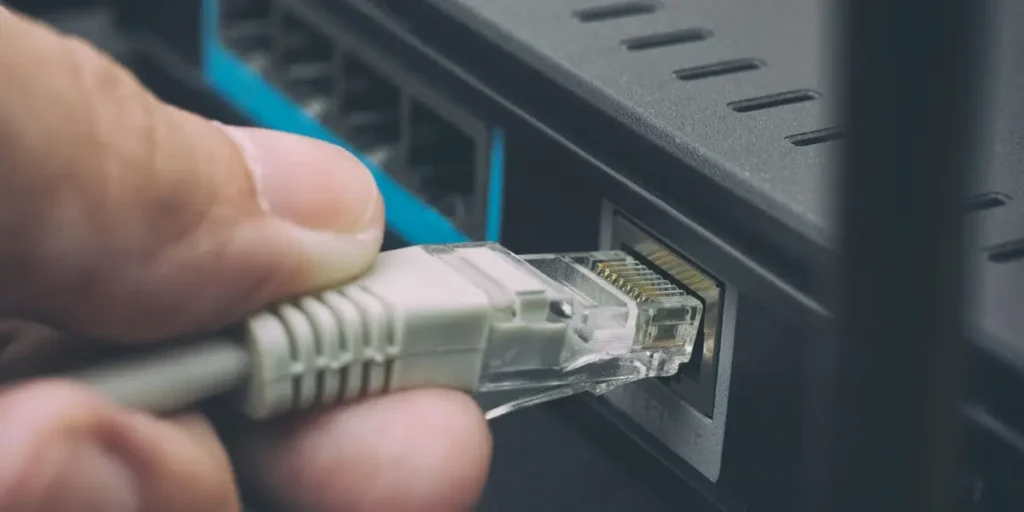
Next, find the USB cable that came with the printer. Connect one end to the printer and the other end to your computer. If your printer supports Wi-Fi, refer to the user manual to connect your printer to your home network. This generally involves selecting the Wi-Fi network from the printer’s menu and entering the password.
Place the printer close to your computer or router for a strong connection. Make sure it is in a position where it can easily load paper and access ink or toner cartridges.
Installing Printer Drivers on Your Computer
Go to the printer manufacturer’s website to download the latest drivers for your printer model. Drivers ensure your computer and printer can communicate effectively.
Select your operating system (Windows, macOS, etc.), download the driver package, and run the installer. Follow the on-screen instructions. You may need to restart your computer to complete the installation.
If your printer uses a CD for driver installation, insert the CD into your computer’s drive and follow the prompts. If you face any issues finding the drivers, check the support section of the manufacturer’s website or consult the printer’s user manual.
Setting Your Printer as the Default
Go to your computer’s settings. On Windows, open the Control Panel and click on “Devices and Printers.” Find your printer in the list, right-click it, and select “Set as default printer.”
On macOS, open “System Preferences,” then “Printers & Scanners.” Select your printer from the list on the left, and click the “Default” button.
This ensures that your computer uses your printer for all print jobs unless you choose another printer manually. Verifying that your printer is the default prevents printing errors and streamlines your workflow.
Printing Your First Test Page
Load paper into the printer’s input tray. Make sure it is properly aligned and not overfilled. Open a document or image file on your computer.
Go to the print command, usually found under “File,” and select “Print.” Ensure your printer is selected in the print dialog box. Look for a “Print Test Page” button in the printer settings or utility software, and click it to print a test page.
Check the test page for clarity and alignment. If anything looks off, refer to the printer’s troubleshooting guide. This step helps confirm that everything is set up correctly and that the printer is ready for regular use.